Click the Add Polygon button at the top left of your map. A New Polygon dialog box appears, and your cursor changes to . Click on a...
- Click the Add Polygon button
 at the top left of your map. A New Polygon dialog box appears, and your cursor changes to
  .
. - Click on a series of places on the map to form a polygon. Each time you click, a new node is added to your polygon. You can also click-and-drag to create frequent nodes, which makes a smoother boundary to your polygon. In this example, we will create a polygon around the White Mountains (you may have to zoom out to see the entire mountain range).

- In the New Polygon dialog box, type in a name for the polygon in the Name field. In this example, we typed "White Mountains".
- Type in a description for the polygon in the Description field, which will be displayed in the polygon's pop-up balloon. In this example, we typed "The White Mountains are home to Bristlecone Pine Trees."
- Click on the Style, Color tab, and choose a color, width, and opacity for the boundary lines. Choose a color and opacity for your polygon area, and determine if you want the polygon filled and outlined, only filled, or only outlined. In this example, we chose green colors, a line width of "10.0", and medium opacities.
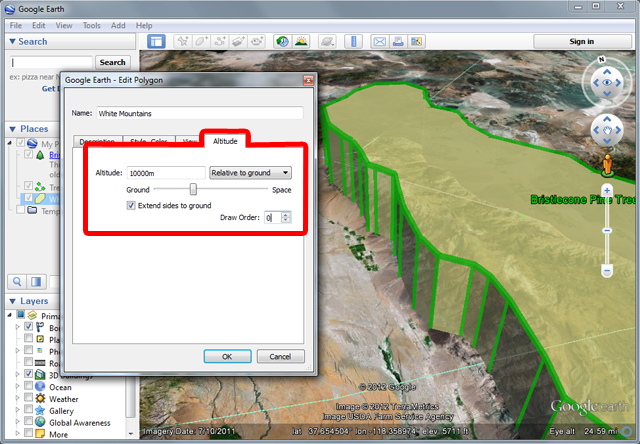
- Click on the Altitude tab, and change the altitude mode to "Relative to ground" (for more information on altitude modes, see the KML Reference guide). Then move the slider to increase altitude, or height, of the polygon if desired. Check the box to extend the sides, or walls of the polygon, to the ground.

Summary :Tips:To edit a polygon's location, name, or description, right-click on the path in the 3D viewer or in the Places panel, and choose Properties (on a PC) or Get Info (on a Mac). Then you can edit the title and description and click OK. Right-click your mouse to delete recently-created nodes. You can also click-and-drag any nodes to reshape the polygon.


COMMENTS